First steps
Once you have followed the steps in the Installation section to install the operator and its dependencies, you will now create a Spark job. Afterwards you can verify that it works by looking at the logs from the driver pod.
Starting a Spark job
A Spark application is made of up three components:
-
Job: this will build a
spark-submitcommand from the resource, passing this to internal spark code together with templates for building the driver and executor pods -
Driver: the driver starts the designated number of executors and removes them when the job is completed.
-
Executor(s): responsible for executing the job itself
Create a file named pyspark-pi.yaml with the following contents:
---
apiVersion: spark.stackable.tech/v1alpha1
kind: SparkApplication
metadata:
  name: pyspark-pi
  namespace: default
spec:
  version: "1.0"
  sparkImage: docker.stackable.tech/stackable/pyspark-k8s:3.3.0-stackable0.1.0
  mode: cluster
  mainApplicationFile: local:///stackable/spark/examples/src/main/python/pi.py
  driver:
    cores: 1
    coreLimit: "1200m"
    memory: "512m"
  executor:
    cores: 1
    instances: 3
    memory: "512m"
And apply it:
kubectl apply -f pyspark-pi.yaml
Where:
-
metadata.namecontains the name of the SparkApplication -
spec.version: the current version is "1.0" -
spec.sparkImage: the docker image that will be used by job, driver and executor pods. This can be provided by the user. -
spec.mode: onlyclusteris currently supported -
spec.mainApplicationFile: the artifact (Java, Scala or Python) that forms the basis of the Spark job. This path is relative to the image, so in this case we are running an example python script (that calculates the value of pi): it is bundled with the Spark code and therefore already present in the job image -
spec.driver: driver-specific settings. -
spec.executor: executor-specific settings.
If using Stackable image versions, please note that the version you need to specify for spec.version is not only the version of Spark which you want to roll out, but has to be amended with a Stackable version as shown. This Stackable version is the version of the underlying container image which is used to execute the processes. For a list of available versions please check our
image registry.
It should generally be safe to simply use the latest image version that is available.
|
This will create the SparkApplication that in turn creates the Spark job.
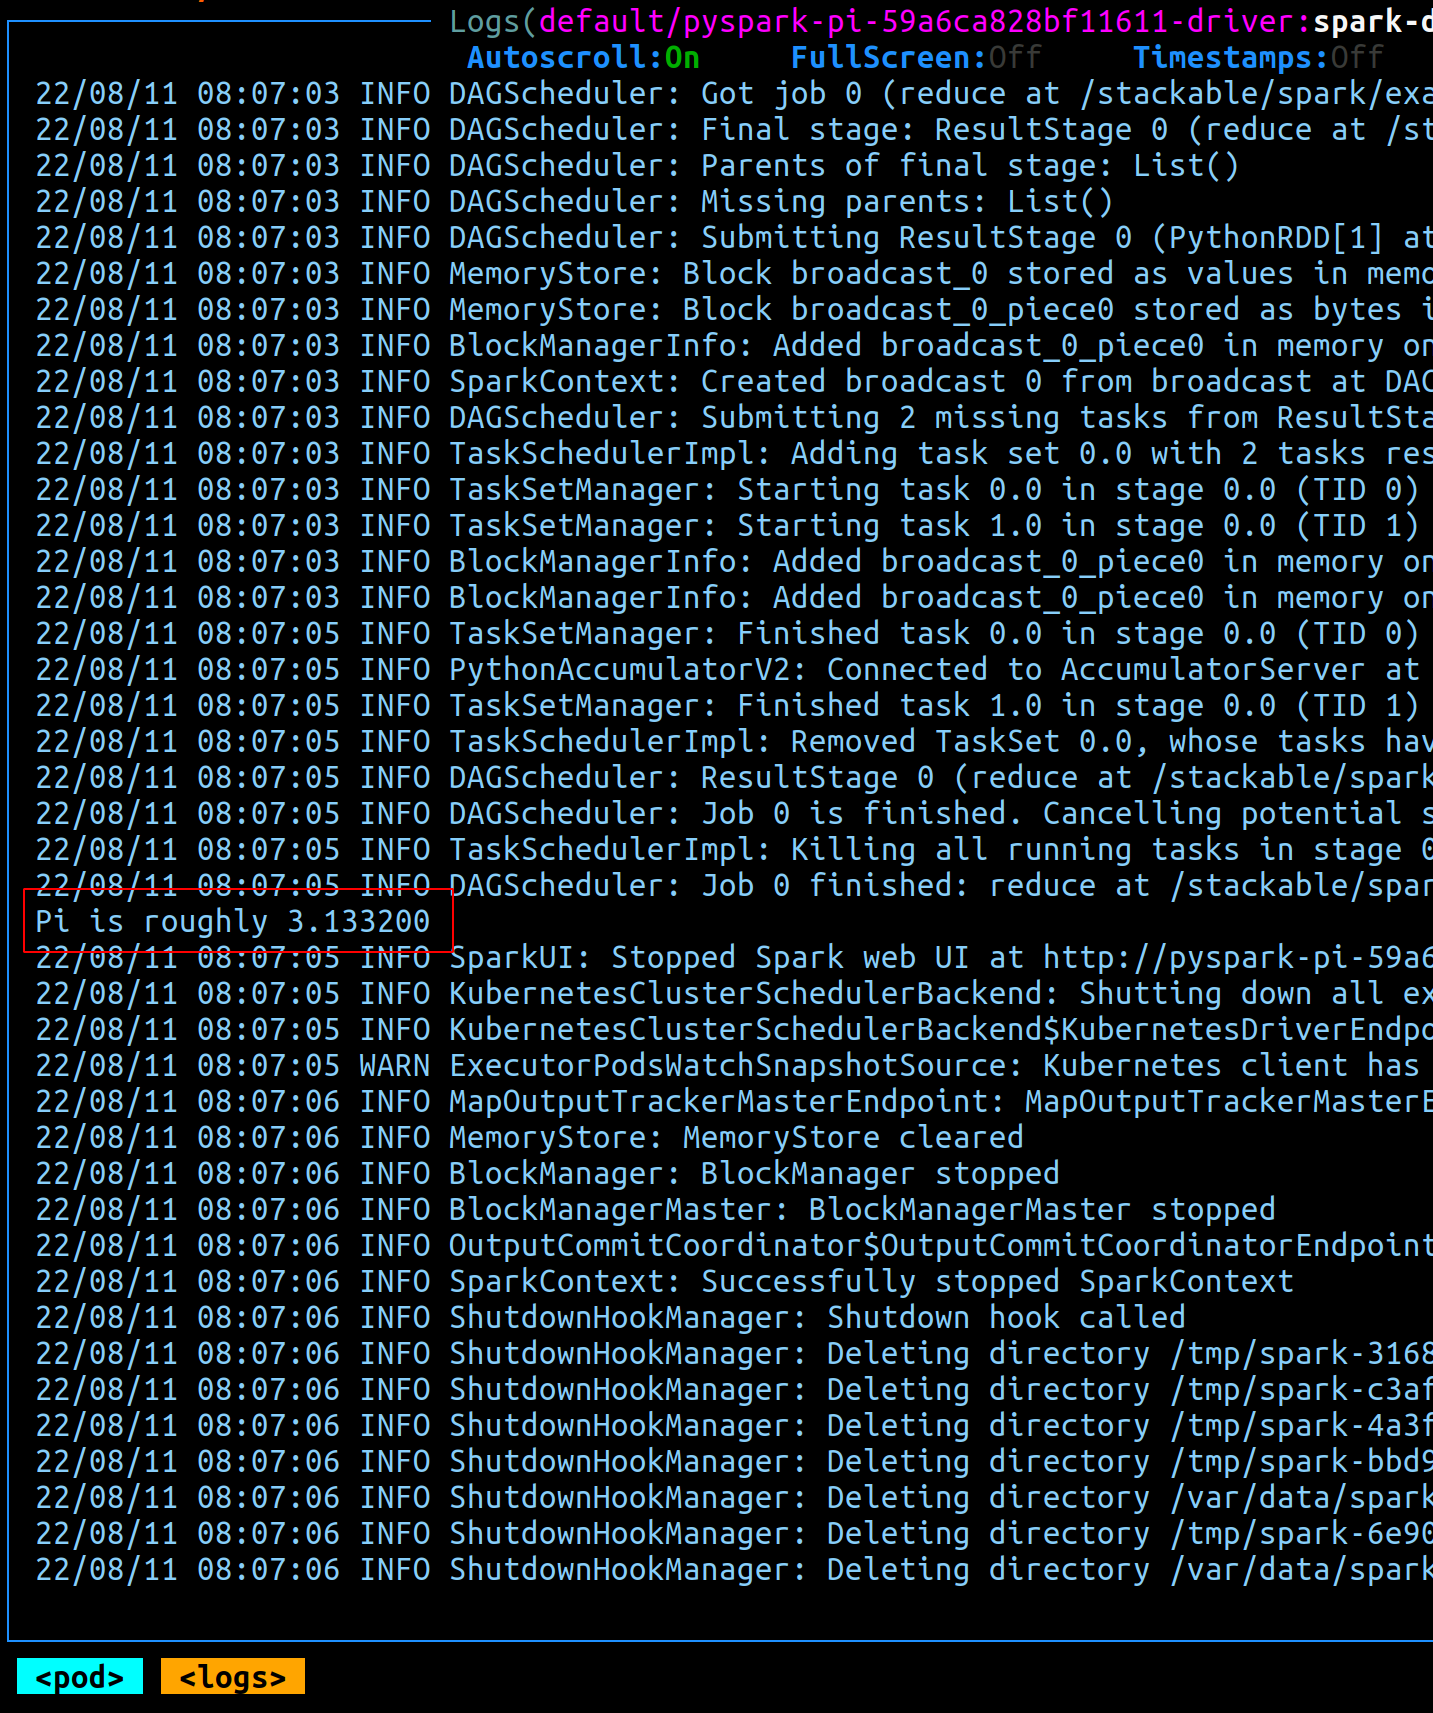
Verify that it works
As mentioned above, the SparkApplication that has just been created will build a spark-submit command and pass it to the driver pod, which in turn will create executor pods that run for the duration of the job before being clean up. A running process will look like this:
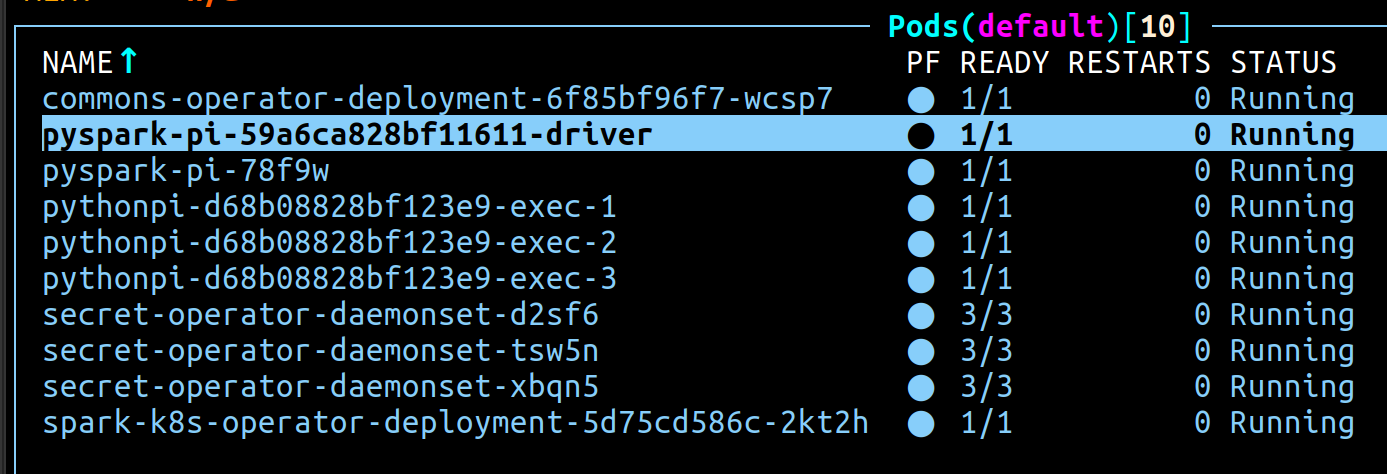
-
pyspark-pi-xxxx: this is the initialising job that creates the spark-submit command (named asmetadata.namewith a unique suffix) -
pyspark-pi-xxxxxxx-driver: the driver pod that drives the execution -
pythonpi-xxxxxxxxx-exec-x: the set of executors started by the driver (in our examplespec.executor.instanceswas set to 3 which is why we have 3 executors)
Job progress can be followed by issuing this command:
kubectl wait pods -l 'job-name=pyspark-pi' \
  --for jsonpath='{.status.phase}'=Succeeded \
  --timeout 300s
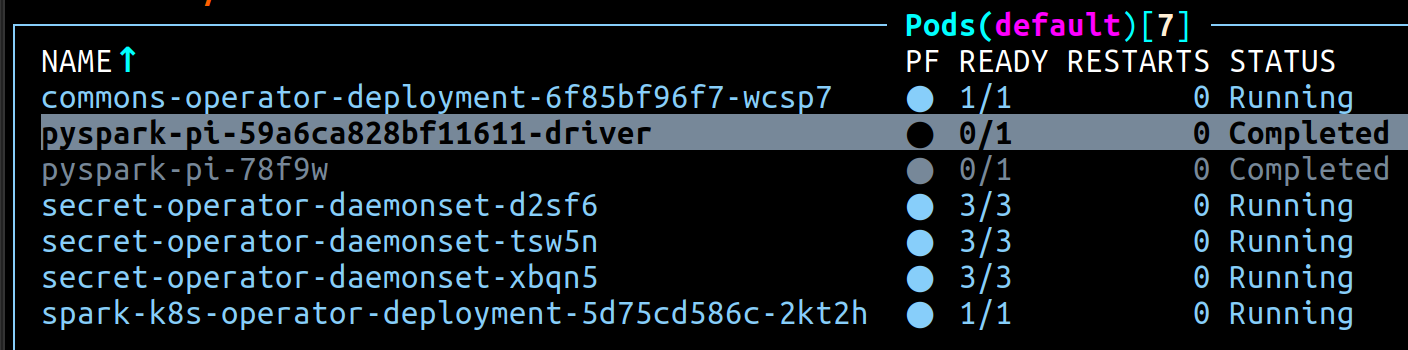
When the job completes the driver cleans up the executor. The initial job is persisted for several minutes before being removed. The completed state will look like this:
The driver logs can be inspected for more information about the results of the job. In this case we expect to find the results of our (approximate!) pi calculation: